Learn CBSE Forum
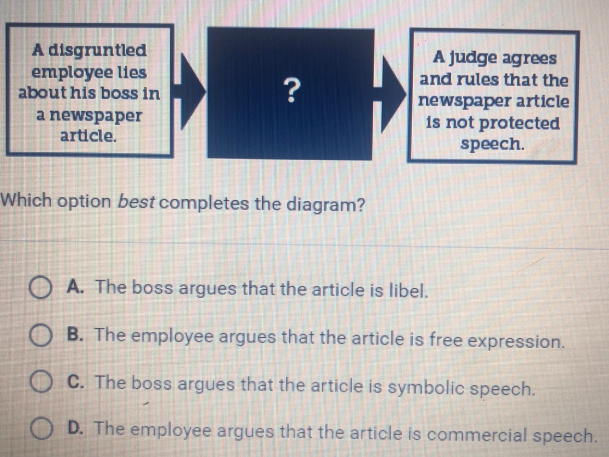
Which option best completes the diagram?
Home Work Help
home-work-help
Karthik
April 27, 2019, 5:41am
1
Which option best completes the diagram? Apex